Complete ij.start.canon printer setup Guide
Find detailed information on ij start canon Setup and Login using ij.canon.start and https://ij.start.canon
- Contact Us
- Get Immediate Support
Canon printers are opted for the most by users. This brand success can be owed to the brand’s reliability and name. No doubt, the devices are easy to manage and incur less maintenance costs. If you are planning to purchase a new Canon printer for your home/office, learning about the canon printer setup steps will prove very beneficial. This knowledge will also come to your rescue when you are facing issues related to the printer. This website is intended to educate users on how to setup canon printer using ij start canon so they can complete the canon pixma printer setup process successfully.
Canon Printer Wireless Setup- Things to know
The canon printer setup process begins with unpacking the items that arrive in the box. While you are doing so, check if you have the required items available at your disposal or not. If not, you will need to arrange them beforehand.
These items will include-
- Installation CD-ROM,
- Setup Manual,
- Additional Accessories,
- The Printer Device itself.
Furthermore, you will also need a computer system on which you can access the ij.start.canon printer wifi setup wizard via https://ij.start.canon to install the drivers and sync it with your computer system. Once you have arranged for these things, you can follow these steps for canon wireless printer setup:
- Open the printer’s package and check for the in-box equipment. Check if the installation CD-ROM, setup manual, and other accessories are there or not.
- You can also read the setup manual before you begin with the canon printer setup wifi process.
- Remove the styrofoam packaging from the sides of the printer and peel off the stickers from the device.
- Remove the packing materials from the scanner glass and the feeder. Grab the power cord provided along with the printer and plug the power cable into the power supply slot.
- Plug the other end of the power cable to the slot available on the printer at the rear.
- Now, press the power button you see on the printer’s control panel. You can now start with the installation for the ink cartridge.
- You can now load papers into the paper tray and also install the required printer drivers on your computer system.
In order to connect a printer to the computer, printer drivers are important components that enable it to perform required functions such as printing itself during pixma canon printer wifi setup.
For Canon printers, there will be two types of drivers: the MP driver or the XPS driver. The XPS printer driver provides a smooth gradation printing as compared to the basic drivers. You can download the required drivers from the official Canon website or via ij.start.canon.
How to setup Canon printer for a computer?
Canon printer setup for Windows 10
When installing your Canon Printer on a Windows computer, make sure you are logged in on an admin user account while performing printer setup process. You might need to disable the antivirus software installed on your computer system. When you do so, you will see a confirmation message asking your consent to restart the system. Follow the on-screen steps and then click on the Okay button. The installation process for Canon printer will resume from the same point. If you are using a disc for installing the printer, do not remove it during the process.
Once ready, the following steps will answer how to setup canon printer on Windows 10:
- Turn off the printer before you continue. Press the power button. Notice the Power LED till it stops flashing.
- Power on your computer and start Windows. If you see a “Found New hardware” screen, unplug the USB cable connected to your computer and click on the Cancel button to quit the screen.
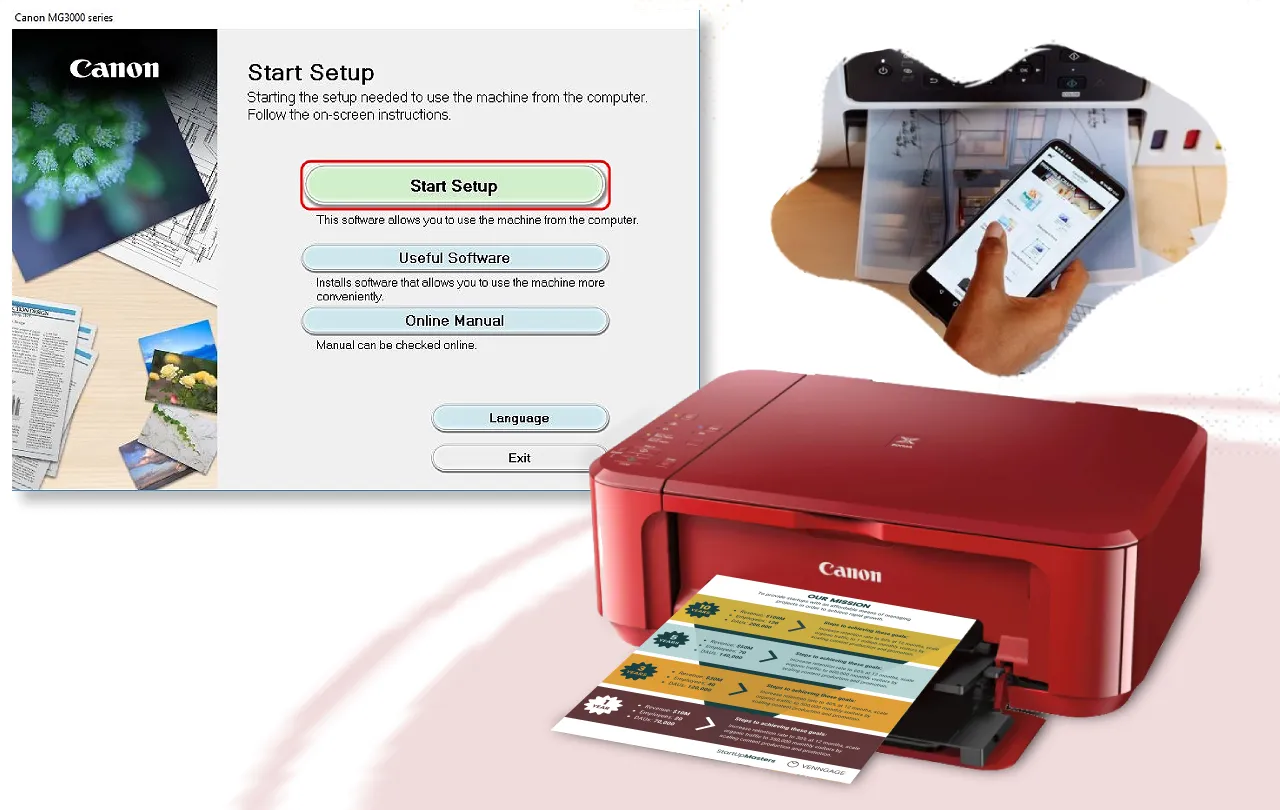
- Install the Setup CD-ROM into the computer drive and the setup program will run.
- Once the autoplay screen appears, click on the Run Msetup4.exe button.
- Once you see a prompt asking for your consent, click on the Continue button.
- You will now see the main menu appear on the screen. Click on the easy install button to continue with the printer setup process. This will initiate the installation process and the printer drivers will begin to install automatically.
- Once you see a list of apps to install, confirm the same using the check button and then click on the install button.
Additional Printer setup steps
- Read through the License Agreement and click on the Yes button now. You may see the software installation screen. Simply follow the instructions you see on the screen to get the setup process initiated and the process started.
- Once the Printer Connection wizard appears on the screen, connect one end of the USB cable to the computer and the other end to the printer device to continue with the setup.
- When the Print Head alignment window appears, click on the Execute button.
- Now, load the paper into the rear tray and click on the Print Head Alignment button.
- Click on the Ok button now. The printer will now print a pattern indicating that the Print Head Alignment is complete.
- Click on the Next button from the Print Head Alignment window. An Installation Results page will appear on the screen. Click on the Next button again.
- A survey program window will appear on the screen. Confirm the message by clicking on the Agree button.
- The Installation Complete message will now appear on the screen. Click on the Exit button. If the system restart message is displayed, click on the Restart System Now button.
The Printer setup for Windows 10 is now complete.
Canon printer WiFi setup on Mac
Login to your mac computer as an admin user before starting setup. Make sure that you disable all antivirus programs and software.
Once done, below are some steps you can follow:
- Connect the computer and printer using a cable. Power on your printer and computer now.
- Insert the setup CD-ROM in the drive and wait for the setup to run.
- Double click on the Setup icon and an authentication screen will appear. Type in the admin name and password and click on the Ok button.
- Once the main setup wizard for Canon Wireless Printer Setup appears, click on the Easy Install button. This will install the on-screen manuals, application software, and printer driver automatically.
- Read through the License Agreement and click on the yes button. You will now see the software installation screen. Follow the on-screen instructions to install the software.
- The Print Head Alignment Recommended screen will now appear. Simply, click on the Next button.
- Once you see the Setup Complete screen, click on the Next button.
Now, you can click on the restart button and the computer will restart. The Canon printer software installation process is now complete.
How can I setup a Canon printer without the CD?
If you are looking to setup your Canon Pixma printer without CD, the built-in setup drivers can come in handy. Here are some steps you can follow:
- Launch the Control Panel and click on the Devices and Printers option you see on the screen.
- Click on “Add a Printer” option and the system will begin looking for the printer device.
- Once you see the name of the printer on the screen, click on it and follow the on-screen instructions to start the installation process.
The Canon Wireless Printer Setup will now complete and you can run a test print using the command you see on the page.
How do I set up a Canon IJ printer with wifi?
You can complete the canon wireless printer wifi setup process in easy steps:
- Turn on the printer and then click on the Setup button.
- Select Wireless LAN Setup option using the navigation keys.
- Now, select the “Other Setup” and then click OK.
- Select the Cableless Setup option and press the OK button.
- The printer is now ready for wireless LAN connection. You’ll need to install the software to complete the wireless setup for your Canon Printer Setup.
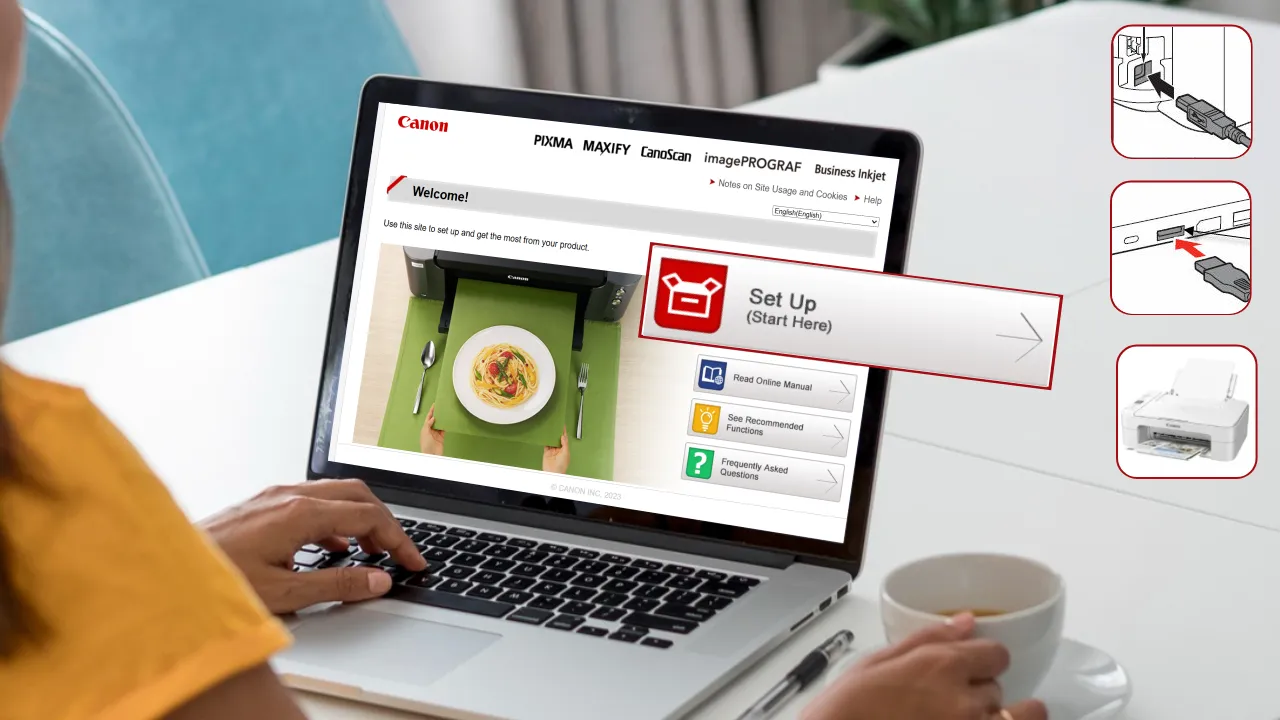
- Open the web browser and visit https://ij.start.canon to finish printer setup.
- Then select the region you are in, the name of the printer, and the OS of the computer.
- When you reach the section for Product Setup, click on the Download button; the setup file will be downloaded.
- Then run the setup file downloaded and setup will initialize automatically.
- Complete the installation process by following the on-screen instructions.
- Now click on the Next button.
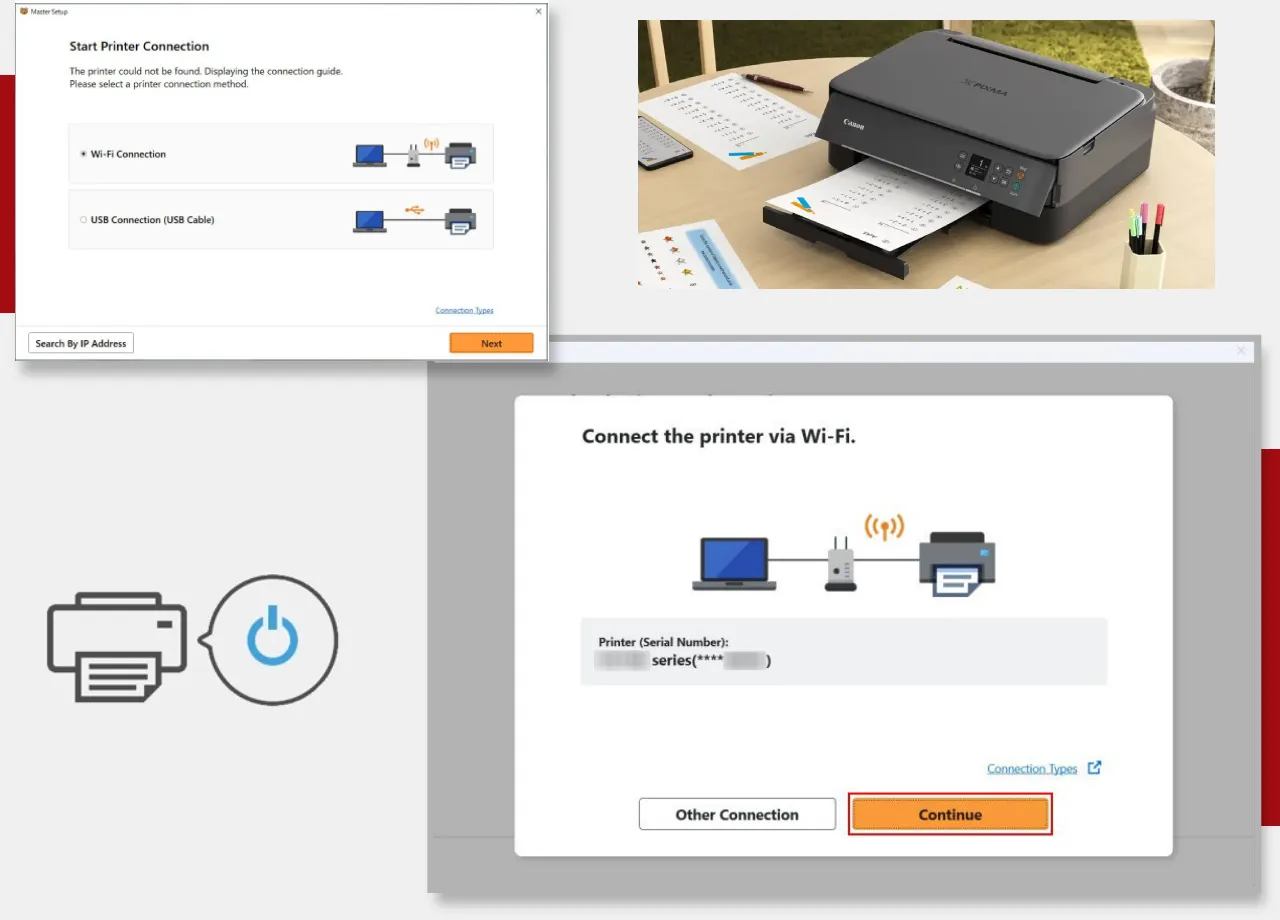
- Click on the Wireless LAN connection menu and then on the Next button.
- Select the radio button next to the “Connect via Wireless Router” option and click on the Next button.
- Again, click on the Next button.
- Click on the Cableless Setup option and Next button.
- On the Software installation List window, again click on the Next button.
- Now, just follow the on-screen instructions to complete the installation process and select the Complete button from the Setup Completion window.
- Click again on the Next button, and the Canon wireless printer wifi setup will be complete.
The Canon Wireless Printer Setup process is complete and you can run a test print job.
Steps to connect canon printer with wifi
This section will explain how to connect canon printer to wifi network easily using canon wireless printer wifi setup. After installing the required canon printer driver from ij.start.canon, these are the next set of steps to be followed:
- Switch off the Canon printer and begin the process on your computer.
- Having downloaded the printer drivers, the next step is to double-click the icon of the printer located in the Downloads folder.
- For Windows computers, you will need administrative privileges to install/uninstall programs.
- Select “OK” or “Allow” to continue with the canon wireless printer setup.
- To use the Canon printer over a network, choose the connection network manually.
- Click Cancel on the Connect Cable window, and select Yes when the confirmation screen appears.
- Choose the Select Printer Port checkbox and click on the Manual Selection option.
- Choose the appropriate port and click on the Complete button.
- Restart your computer system to conclude the Canon printer wireless setup and driver installation process.
- You can now perform the same steps to install the MP and XPS driver on your computer system
How to connect canon printer to wifi?
The Canon printer user manual will provide you with the necessary information and instructions to set your printer up and use it after completing canon pixma printer setup. This can be obtained from the official Canon website or through https://ij.start.canon. Click on the link, and the Canon printer user manual will save itself as a PDF file. The general guidelines and troubleshooting steps are also explained in the user manual. You will also be provided with a “Get Started” guide in your printer package. Information related to canon printer setup, network connections, printer functions, and troubleshooting procedures is also available in them.
How to connect canon printer to laptop?
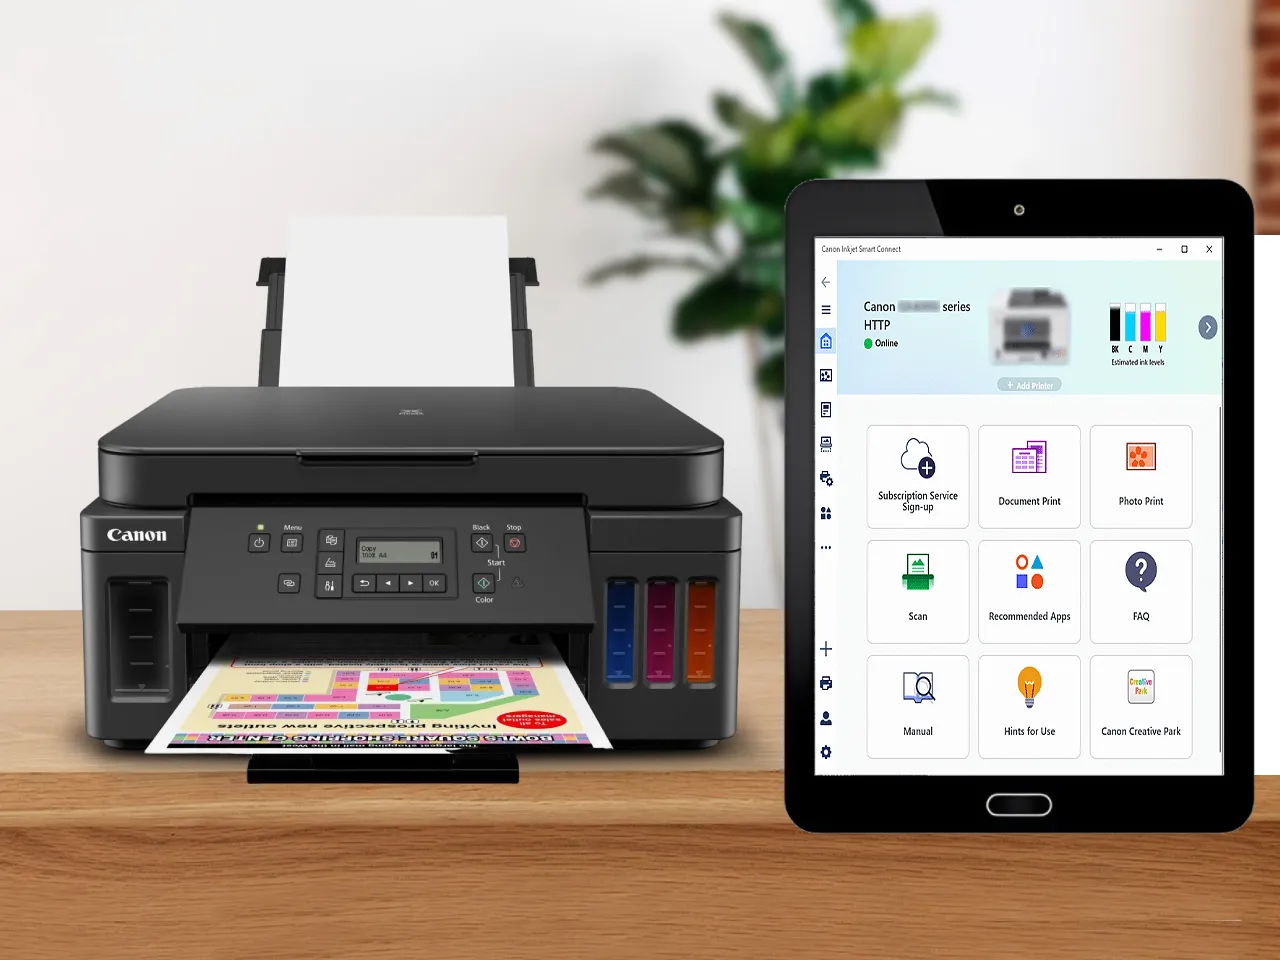
Here are some easy instructions to set up the Canon printer Utility on your laptop during Canon printer setup:
- Go to the official canon site or ij.start.canon and type the model number of your printer to find the printer drivers.
- Choose the OS and the system version if not selected automatically.
- Tap on the Drivers tab and select the driver file. Click on the Download button to download and install on your computer system. Make sure you download the MP driver that includes the Canon Utility package.
- Once the download process is complete, navigate to the directory where the driver file was downloaded and double click on the .PKG file to run it.
- Once the drivers have been installed, under the “Go” menu in Finder, select “Applications”.
- Double-click on the Canon Utilities folder and make use of the device Scan Utility and printer Utility.
These steps will help you complete the canon pixma printer setup. Now, it is time to start printing using your canon printer. You can simply choose a document and release the print command so the laptop prints it.
FAQs
How to print on a Canon wireless printer?
Here are steps if you are looking to print a document using the canon printer after canon wireless printer setup:
- Power on your Canon printer.
- Load the paper of appropriate size in the input paper tray.
- Open the Printer Driver Setup window on your computer system.
- Select the printing profile that you use frequently. Choose the “Quick Setup” tab from the “Commonly Used Settings” section.
- Once you have selected the profile from the Canon Printer Setup page accessed via ij.start.canon, the Additional features such as Media Type and Paper Size Values will be adjusted automatically.
- Set the print quality to High, Standard, or Draft based on your requirements.
- The canon wireless printer setup process has to be completed using the following guidelines being shown on the screen.
- Tap the OK button to save the printer settings.
- Open a random document that you want to print by using the Canon printer and go to the “File” tab.
- Select the Print option to print the document.
How to access the canon setup utility on the computer?
The Canon Setup Utility is usually downloaded along with the MP driver package. After the download and the setup process, you can follow the steps provided to access it online.
- If you use a Windows 10 operating system, click on the ‘Start’ button and select ‘All Apps.’ Open the ‘Canon Utilities’ tab by double-clicking on it and then select ‘Network Device Setup Utility.’’
- If you are using a system with Windows 8.1 or have Windows 8 installed, you will need to select the Network Device Setup Utility from the Start screen itself.
- In case you have Windows 7 or Vista installed on your computer, click on the Start button and choose the “All Programs” menu and select “Canon Utilities”. Now, click on the “Network Setup Utility” option to access it.
How do I copy a document on the canon printer?
Here are some steps you can follow to generate multiple copies from a canon printer:
- Turn on the Canon Setup by pressing the Power button.
- Extend the input tray and load it with the paper of desired size.
- The original document should be placed on the platen.
- Tap the Paper button. This will turn on the Upper Paper lamp.
- Now, press the Color button for color copy and the Black button for Black & White copy.
If you think you require multiple copies of the document, click on either of the Color or Black buttons repeatedly until the desired number of copies are printed.
How to reset canon printer?
If you need to reset Canon printer for any reason like canon printer not printing after canon printer setup, here are the steps you can follow:
- Access the control panel on your printer.
- Navigate to Settings menu.
- In the menu labeled Wireless Setup, click on the option labeled Printer RESET.
- Click on the Yes button after the confirmation dialog box appears.
Your Canon printer will now reset and you can complete the canon wireless printer setup using ij.start.canon again.